Sunday, December 1, 2013

Southern Gravures

Chapel of Ease plate, it hasn't survived all that well

You may or may not know that I lived for a couple of years in Savannah, GA, when I first began my BFA. It turned out that the south was just not my cup of tea but I did have some amazing experiences there. 
My most common photographic subjects while I lived there were the numerous church ruins that could be found just over the border in South Carolina. The other night I had a dream that I was back there photographing. Strange, I know, but I just couldn't resist doing a little throw back and posting some images I took there. After moving to San Francisco, I turned the original large format negatives into photogravures (a long, complicated process that results in copper negatives that are printed on an etching press).

The Chapel of Ease was one of the easiest places to get to, being right off a main road. 

Old Sheldon Church was a little harder to find but possibly my preferred spot to explore and photograph. The church grounds are rather marshy and the ruins are surrounded by trees that make the entrance somewhat dark and gloomy. The ruins themselves are on a bit of a hill and in full sunlight, on a good day. You are so taken by this as you walk up, that you don't notice the strangeness of the trees, until you turn around to leave...

At some point in the past, the holes in the trees were bricked up. I am sure there is some innocent reasoning behind this but I always found them a little spooky, considering the ruins and graves nearby. 

Monday, November 25, 2013

Letterpress Gift Tags


Earlier this week I got to spend a day in the letterpress studio at the San Francisco Center for the Book teaching my first ever letterpress workshop--Letterpress Gift Tags.


The workshop was an awesome 3 hours of printing gift tags on tabletop platen presses. 


We began with learning to set lead type and basic press operation. Then we got right down to business with printing.

 Happy Winter was my design. The typeface kinda reminds me of a beer label...

 This one was a warm up for the students at they learned to work the press

How could we make holiday tags without naughty/nice ones?


Class ended with rounding corners, punching holes and adding string, so the tags could be attached to gifts.


Wednesday, August 14, 2013

Homemade Sign

Last week a friend of mine came back home after about a month in Europe. Another friend and I were thrilled to pick him up at the airport and we decided it would be fun to make one of those cheesy welcome home signs you always see in the movies. 

It began with a sketch of what the sign should look like. This also helped me catch spelling and logistical mistakes before we went large-scale.

Then, to the big blank page...

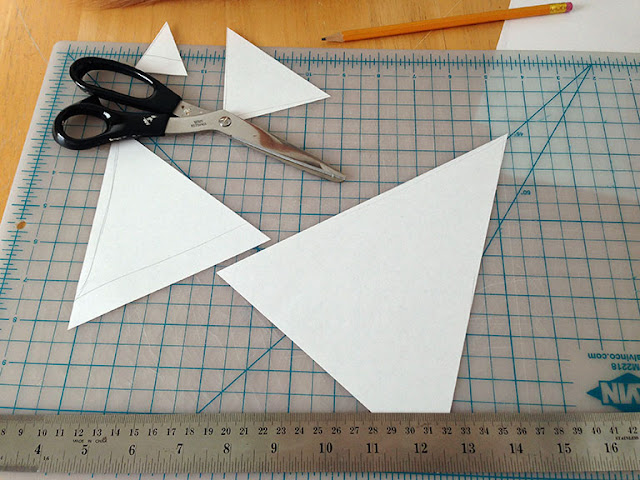
The plan was to have a faux bunting feel so I made a template triangle then traced it to get all the other triangles. Since we were being cheesy, I wanted the sign to have a playful/childish look so the triangles were free-hand cut with an X-acto making each one a bit different.

We just used glue sticks and my trusty bone folder to attach everything.

The letters were all hand drawn and colored; again to keep a playful look.

The finished sign was a hit! Sadly, I do not have an image of Sergei actually happy to see it, but it helped him find us, I swear.

Saturday, August 3, 2013

An Update

Long time, no see, blog world! With a {somewhat} recent change in jobs and other life changes, I have been kept quite busy and, unfortunately, away from the computer.

Here's an update of some of the things I've been up to since my last post:

Still on a repurposing craze after the cereal box books I made for Craftcation, I created a new journal made from 6-pack containers; 

 
I was lucky enough to be a vendor at the spring Patchwork Oakland where neon sprinkles studio debuted a new display set-up and a new sign;

I taught a few more sessions of Introduction to Bookbinding at the San Francisco Center for the Book;

After class, I turned some of the scraps from our books into mini accordion books.

I moved. This photo was taken right after the move, I haven't had much time for unpacking so it's still pretty accurate...

 I decided I was tired of my mousy brown hair and had a little fun with hair dye;

I started working on hand-drawn patterns for some new products and a class that I will hopefully debut this fall;

And I took my first ever trip to a Russian grocery store. I couldn't read the packing but I could admire it.

Sunday, May 5, 2013

P is for Pinwheel

Besides teaching and working, I've also spent the past couple of weeks working on a new product/project that I'm calling P is for Pinwheel.

Inspired by the Altered Book show at the Marin MOCAKayte Terry, and the idea of how books are read and interpreted, I decided to put a letter P encyclopedia, found at a San Francisco Public Library book sale, to use.


I cut down pages from the encyclopedia and pasted them on solid color paper, did some folding and measuring, and cut them just so, so that they could be twisted and pinned into a pinwheel shape.


The finished paper wheel was stuck to a straw for a lovely twist on an old favorite. These are a bit more fragile and don't spin as freely as your standard pinwheel but I think they're more fun and informative.

Some of you may be wondering how a book lover such as myself could sacrifice a book in this way. Let me explain. This particular reference tome had been orphaned. This means it was separated from the rest of the set it came from and, not being a first edition or otherwise rare or antique, it had no historic value. Having lost its brethren, it had little to no value for resale and would have been destined for the trash or a creative reuse center had I not purchased it. I enjoyed being able to give it new life and look forward to sharing the pinwheels with others to see how they interpret this book in its new form.


If you're interested in having an encyclopedia pinwheel of your very own, I'll be selling them at my booth (neon sprinkles studio) at Patchwork Oakland on May 12 (Mother's Day).

Saturday, May 4, 2013

Lately

Things have been quiet on the blog because I've been quite busy in the real world. 


At the end of April I taught a session of Introduction to Bookbinding at the San Francisco Center for the Book. I say this after every class but, April's workshop was the best one yet! One of the things I really enjoy about teaching bookmaking is that it's such a universal object form that everyone can understand (even the e-reader folks). In this particular workshop I had the pleasure to teach bankers, lawyers, art students, and even a database manager!


A few days after the workshop I was back at the San Francisco Center for the Book for an evening of simple bookmaking demos at the grand (re)opening (a big open house celebrating the move to a bigger and better building). 


I spent the night teaching visitors how to make maze, or meander, books. These are fun, simple structures made out of a single sheet of paper. I like them because they can open in any direction and have all these secret little spots to discover and they can also be flattened to view a single image all at once, instead of page by page (like this one, made out of a photocopied map of Michigan). 


Just some of the happy folks with their aMAZEing books!

Not sure if I remembered to mention it but, on Mother's Day, I will be a vendor at Patchwork Oakland! It will be the first time I have an entire booth space to myself and I couldn't be more excited. I've made some new products for the show (just wait until tomorrow's post) and Charlie even built me a folding wall to ramp up my display.


I've been working hard to get the word out about the show (I hope you'll stop by!) and one way I decided to invite folks was by seinding out customized event postcards. 


With scrap paper, washi tape, scissors, a hole punch, and some kitchen twine to tie it all together (craft pun alert!) I made these fun little invites. I have a few left over, if you'd like one of your very own, let me know!

Tuesday, April 16, 2013

A New Table Top

As I work more and more in my studio, it seems I need more surface space to work on. The other day, a new table was made from two sawhorses and an Ikea table top. 


Now, I don't like anything to be boring, and the dull black of the table was not working for me. So, with some paper, contact paper, a ruler, a pencil, and an X-Acto knife, I set to work 'redesigning' the top.


And voila, a fun new table top for my needs: